
Posted by Stephanie Alexander on 24th Oct 2022
DIY: Natural and Practical Basic Handmade Soap
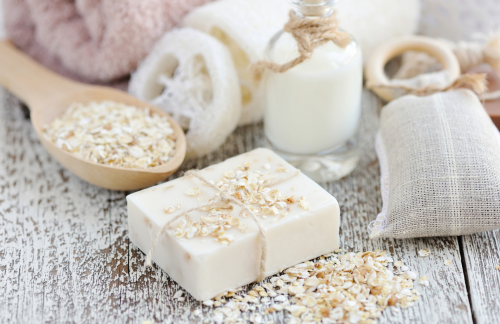
NATURAL AND PRACTICAL BASIC HANDMADE SOAP
I was about 23 years old when I first learned how to make home-made soaps. Even when I was a child, I liked to make useful things. I grew up constantly trying to create home-made skincare. I liked the idea that the skincare products I put on my skin were safe for my skin and my health. I constantly watched YouTube channels that were all about natural skin care, natural remedies, and non-toxic beauty. I am very self-conscious because as a teenager I had really oily skin an I was prone to acne. I used to have a lot of acne on my face, my back, ears, and nose which hurts the most. I continued to create natural products for my skin until I started seeing progress. I always had home-made lip scrub, lemon and oatmeal facial scrub, egg white skin tightening mask, and natural clay facial mask. Then I started learning how to make home-made soap. The home-made soap became a favorite. Every time I made soap and gave it as gift, the grateful recipients were always amazed by the idea that I made it myself at home and in my kitchen. They were thankful and appreciative and it made me feel really happy that I could give them something useful that they could also enjoy. Soap making to me is very satisfying and rewarding. I feel so much pride each time I create something that is useful and at the same time beautiful. The happiness and satisfaction that I feel each time I make home-made soaps is still the same feeling I felt the first time I made it. My bathroom is filled with natural hand-made soap, and to me they’re one of the things in life that I enjoy a lot. I smile each time I get a glimpse of them and can’t help myself but touch them and smell them.
WHAT IS SOAP AND HOW IT IS MADE
Soap is made by combining an alkaline solution, (in this case sodium hydroxide or lye water) with an acidic solution (animal fats or vegetable oils). When combined and mixed in the right amount they neutralize and create a new compound called soap. This process is called Saponification. For this basic soap tutorial, we are going to use the cold process method. This method uses only the heat of the chemical reaction between the lye solution and combined oils.
*If the recipe calls for some oils that are solid at room temperature, you will have to melt them before hand, so they are able to react with the lye solution. You can use your microwave in 10 to 20 second increments to get them to a liquid state. Only go a little at a time so you don’t get the oils too hot.
Today we will make a basic 3 oil soap with an option to add a natural colorant and scent it with essential oil.
SAFETY EQUIPMENT
1. Always wear safety googles from start to finish of the soap making process even when cleaning up.
2. Wear gloves when handling lye, mixing, and cleaning up.
3. Keep children and pets away from your working area through the entire process. Lye solution is very caustic, and temperature could reach up to 185F and can burn your skin. It can also cause chemical burns, so be very careful.
4. Keep a separate set of soap-making bowls, tools, and equipment and store them separately from your kitchen utensils.
5. Keep a bottle of apple cider vinegar nearby in the event you have a caustic spillage on your skin.
6. Lye solution is poisonous. Keep out of reach of children. Drink plenty of water if ingested and contact poison control. If it splashes in your eyes, rinse your eyes with water for at least 30 mins. Strong fumes are released when caustic soda and water are mixed. Mix outside or an area with a very good air ventilation.
7. Let your soap cure for at least four weeks before use.
SOAP-MAKING EQUIPMENT (These are the ones I have. If you prefer to choose a different type or brand, you are welcome to do so.)
Wax Paper (Optional, buy it only if you don’t have soap molds)
Thick towels
Knife
Soap Molds (If you don’t have soap molds you can also use empty boxes, just line it with wax paper)
(Just various soap molds I use, feel free to get any style that you want, there are various designs to choose from)
BASIC SOAP BASE
5.28 oz Distilled Water
2.35 oz Sodium Hydroxide (Keep in airtight container until ready to weigh and use it. It attracts water molecules which adds to the weight and decreases the strength of the lye).
ADDITIVES | NATURAL COLORANT (Pick one and add 1 ounce)
ESSENTIAL OIL (Pick one or Blend ratio 1:1 | Total Essential Oil 3/4 ounce per pound of soap )
Let’s get Started:
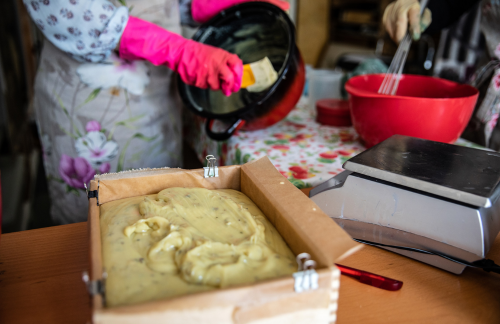
1. Prepare all the oil ingredients: Melt the solid oils, and once melted you can mix all the main oils together (in this case the Olive Oil, Coconut Oil, and Sunflower Oil) save the essential oils for the scent for later. Set aside to let it cool to between 95-100F.
2. Weigh distilled water into large plastic bucket, bowl, or measuring cup. Set aside
3.Weigh the caustic soda. Add the caustic soda to the water, DO NOT pour the water into the caustic soda!
4. Gently stir the lye water to dissolve. Let it cool down until it reaches 95-100F. When it starts getting close, check your oils again to be sure they are also at 95-100F. If they need to warm up a little, put them into the microwave to get them to the right temperature (again, 10 seconds or less)
5. When both the oil mixture and the lye water are at 95-100F, add the lye water to the oils.
6. Stir continuously or use the stick blender for quicker trace: Trace occurs when mixture thickens and you can see a line of soap on the surface when you dip a spoon or spatula in and drizzle a line across the surface. One you have trace, don’t blend too much after that.
7. Add your choice of color or additive, then add the essential oil while using the stick blender sparingly, use it just enough to mix them in.
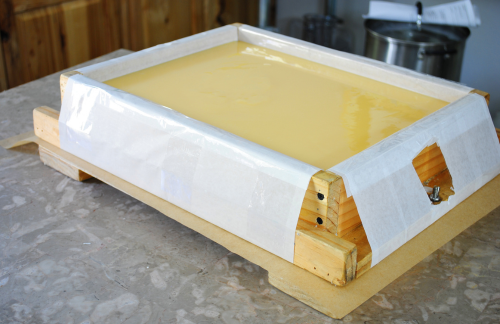
8. Pour into the prepared mold. Cover and tuck away for 24-48 hours and then unmold.
9. Let it cure for 4-6 weeks.
Now you have a practical soap for your family and friends to try. Questions? Leave your comment below, or email info@lelusoaps.com.